
Table of Contents
- Why Graphic Tee Prints Crack, Peel, and Crumble
- How to Wash Graphic Tees Properly to Prevent Damage
- Does Hot Water Ruin Graphic Tees? Temperature and Print Durability
- How to Dry Graphic Tees Without Damaging the Print
- Print Method Matters: Screen Print vs. Heat Transfer vs. Vinyl
- How to Fix a Peeling Logo on Clothes: Safe Repair Options
- Choosing Quality Graphic Tees That Last Longer
- Frequently Asked Questions
Last Updated: October 12, 2026
Why Graphic Tee Prints Crack, Peel, and Crumble
To prevent graphic tee cracking, you must understand why prints fail when the ink bond weakens over time.
Print methods fail differently: screen prints sit on top of the fabric, heat transfers separate under extreme conditions, and vinyl peels when the adhesive breaks down.
Most damage happens in the wash and dry cycle, and you can prevent graphic tee cracking by following the right steps.
How to Wash Graphic Tees Properly to Prevent Damage
Proper washing is the biggest factor in preventing graphic tee cracking, the method matters more than any product.
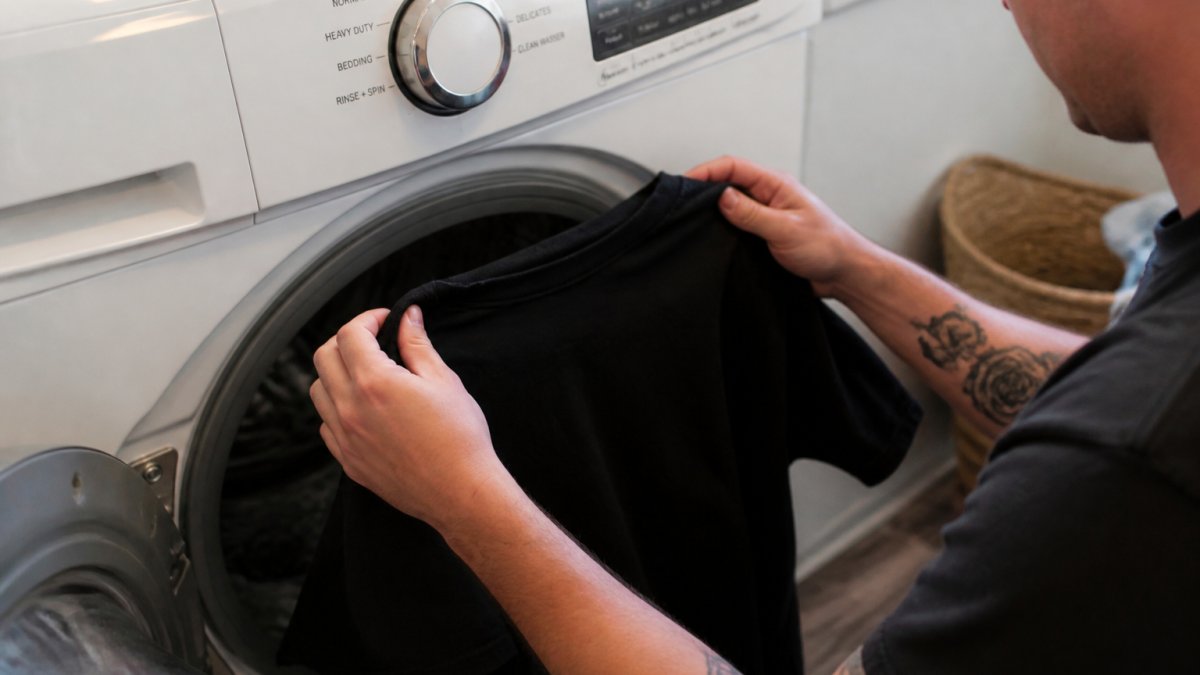
Turn Your Shirt Inside Out Before Washing
When the printed side faces outward, it rubs against the washer drum, other clothes, and water jets. Turning the shirt inside out shields the print, so the fabric backing takes the friction instead. Do this every wash, it takes two seconds and makes a real difference.
Use Cold Water and Gentle Wash Cycles
Hot water softens the bond between print and fabric, breaking down ink adhesion faster than cold water. Cold water keeps the ink stable, since most prints cure best at lower temperatures. Use a perm press or delicate cycle to reduce agitation, and skip the heavy-duty cycle, its extra agitation tears at the print edges.
Skip Bleach, Fabric Softener, and Harsh Detergents
Bleach breaks down the chemical bonds holding the print to the fabric. Fabric softener coats the fibers, weakens the ink's grip, and leaves residue that can peel the print away. Harsh detergents strip the print's protective layer, so use a mild detergent labeled "gentle" or "delicate" instead. For tough stains, treat with cold water and a gentle stain remover before washing.
Does Hot Water Ruin Graphic Tees? Temperature and Print Durability
Hot water damages graphic tee prints faster than cold water because heat softens the ink and the adhesive holding it to fabric, the higher the temperature, the faster this happens. Cold water preserves ink integrity and keeps the print bonded longer, so if you're washing a new graphic tee from Midnight Motor Club or any quality brand, cold water is non-negotiable.
How to Dry Graphic Tees Without Damaging the Print
Drying is where many people unknowingly destroy their prints.
Air Drying vs. Low-Heat Tumble Dry
Air drying is safest: hang your shirt or lay it flat, since no heat means no risk of the print cracking from thermal stress. If you use a dryer, set it to low heat or air-dry mode, high heat makes the ink brittle and shrinks fabric unevenly, stressing the print. If you hang it, keep it out of direct sunlight for hours, which fades prints over time.
Storage and Folding to Prevent Cracking
Fold graphic tees instead of hanging them long-term, hanging stretches the fabric and stresses the print around the shoulders and neck. Store them in a cool, dry place like a dark drawer or closet, since heat and humidity accelerate ink breakdown. Don't stack heavy items on top, as pressure can crease and crack the print.
Print Method Matters: Screen Print vs. Heat Transfer vs. Vinyl
Not all graphic tees are printed the same way, and the care that keeps one print intact can slowly destroy another. Ink chemistry, deposit thickness, and how the print bonds to fabric all change its vulnerability to heat, friction, and moisture. Knowing your print method lets you protect the shirt correctly.
Screen Print
Screen printing pushes thick plastisol ink through a mesh screen and cures it under high heat, leaving a raised, rubbery layer on top of the fabric. Cured properly, it's the most durable common print method, but that layer can crack if flexed repeatedly or exposed to high heat after curing.
Care specifics for screen prints:
- Wash inside out in cold water on a gentle cycle.
- Skip the dryer or use the lowest heat setting. High heat makes the plastisol brittle.
- If you iron, never touch the iron directly to the print. Iron the shirt inside out or place a thin cotton cloth over the design and use low heat.
Heat Transfer
Heat transfers are printed onto a carrier sheet and bonded to the fabric with a heat press. The print is thinner than screen printing, but the bond is more sensitive to temperature swings, heat after manufacturing can soften and separate the adhesive.
Care specifics for heat transfers:
- Cold water only. Warm or hot water can re-soften the adhesive.
- Use the most delicate cycle available and avoid heavy agitation.
- Never put a heat-transfer shirt in a hot dryer. Air dry flat or hang dry.
Vinyl Print
Vinyl prints are cut from colored film and heat-pressed onto fabric. The adhesive backing is the weak point: vinyl peels easily, especially around the edges, and tolerates neither heat nor harsh chemicals well.
Care specifics for vinyl prints:
- Cold water is mandatory. Even lukewarm water can begin to loosen the adhesive.
- Use a gentle cycle with low spin speed.
- Never use bleach, fabric softener, or dryer sheets. These leave residues that break down the adhesive.
How to Tell Which Method Your Shirt Uses
Check the care label first, many brands list the print method or washing instructions. If it's vague, look at the print itself:
- Screen print: The ink feels thick and slightly raised. It may have a rubbery texture. Colors are usually opaque and bold.
- Heat transfer: The print is thinner and may feel slightly plastic or smooth. It can have a slight sheen.
- Vinyl: The print looks like a cut-out shape with sharp edges. It often has a matte or glossy finish and may feel like a thin sticker.
When in doubt, follow the most delicate routine: cold water, gentle cycle, inside out, air dry. It won't harm any print method and gives the most vulnerable prints the best chance of survival.
How to Fix a Peeling Logo on Clothes: Safe Repair Options
Once a print starts peeling or cracking, you can't restore it to brand-new condition, but you can sometimes stop the damage from spreading or stabilize a small peel. The key is knowing which repairs are safe, which are risky, and when to stop.
First: Identify What You're Dealing With
The right response depends on whether the print is cracking, peeling, flaking, or fading.
- Cracking: The ink has dried out and split into lines or a web-like pattern. The print is still attached to the fabric. Cracking is usually permanent, but you can slow it down.
- Peeling: The print is lifting away from the fabric, often starting at the edges. This is common with heat transfers and vinyl. Small peels can sometimes be stabilized.
- Flaking: Small pieces of ink are falling off. This often happens with poorly cured screen prints or very old transfers. Flaking usually means the print is beyond repair.
Safe Repair Options for Small Peels
If the peel is small, less than an inch and only at the edge, you have a few options.
1. The cold-wash-and-air-dry reset
Sometimes a peel starts because heat softened the adhesive or ink bond.
2. Fabric glue (with caution)
A tiny dot of flexible fabric glue under the lifted edge can re-adhere it.
3. Iron-on repair patches
For a small peel on a heat-transfer or vinyl print, a low-heat iron-on patch over the lifted area can hold it down, but only if the surrounding print tolerates heat.
What NOT to Do
Some DIY repair methods circulating online can ruin the shirt or worsen the damage.
- Do not use a hot iron directly on the print. The heat can melt the ink, smear the design, or cause the print to stick to the iron. If you must iron, use a pressing cloth and low heat, and only on the back of the shirt.
- Do not use superglue or craft glue. These dry rigid and can crack the print further. They may also discolor the fabric.
- Do not try to reheat the print in a home oven or with a hair dryer. You cannot replicate the controlled heat and pressure of a commercial heat press. You're more likely to burn the fabric or distort the print.
- Do not pull on the peeling edge. It's tempting to see how much will come off, but pulling can tear the print and leave a ragged edge that's harder to stabilize.
When to Stop Trying to Repair
If the peel is larger than a coin, the print is flaking, or the design is cracking across the middle, repair isn't realistic. Your best options:
- Demote the shirt to a workout or yard-work tee. It's still wearable, just not for occasions where you want the graphic to look sharp.
- Cover the damage with a patch or embroidery. This changes the design but can give the shirt a second life.
- Retire the shirt. If the print is important to you, stop wearing it before it deteriorates further. Store it flat in a cool, dry place.
Prevention Is the Only Real Fix
Once a print starts to fail, you're managing decline, not reversing it. The most effective repair is the care routine you use from day one: wash inside out, cold water, gentle cycle, no harsh chemicals, and air dry. That prevents the vast majority of cracking and peeling before it starts.
Choosing Quality Graphic Tees That Last Longer
Quality starts with fabric: 100% cotton or cotton-blend shirts hold prints better than synthetics, and tighter weaves support better ink adhesion.
At Midnight Motor Club, we focus on honest materials and clean design. Our graphic tees use quality cotton and proper screen printing methods, so they hold up better through repeated washing and wearing.
When you buy a graphic tee, ask about fabric content and print method, and check reviews from people who've owned the shirt for months.
Graphic tee prints fail when care is ignored.
Midnight Motor Club graphic tees are built to last. We use quality materials and proper printing techniques.
Frequently Asked Questions
Can I fix cracks in my graphic tee print?
Minor cracks can sometimes be stabilized with fabric glue applied carefully to the underside, but once the print has cracked significantly, repair options are limited. Heat-applied transfers may be patchable with new vinyl, but screen-printed cracks typically cannot be fully restored. Prevention through proper washing, cold water, and gentle drying is far more effective than attempting repairs after damage occurs.
Does hot water ruin graphic tees?
Yes. Hot water weakens the adhesive bond between ink and fabric, accelerating cracking and peeling. Heat also causes fabric fibers to expand and contract, increasing friction on the print. Cold or lukewarm water (below 30°C) preserves ink integrity and fabric structure, which is why it's the standard recommendation for graphic tee care across all print methods.
How often should I wash my graphic tees to keep them looking new?
Wash graphic tees only when necessary, not after every wear. Fewer wash cycles mean less agitation and friction on the print. When you do wash, turn them inside out, use cold water, select a gentle cycle, and air dry. For everyday wear without visible dirt or sweat, you can safely wear a graphic tee 3-4 times before washing without compromising hygiene or print quality.
Is air drying better than tumble drying for graphic tees?
Air drying is the safest option for graphic tees. Tumble dryers, even on low heat, apply direct heat to the print, which can cause cracking and fading over time. Air drying eliminates heat exposure entirely and reduces shrinkage. If you must use a dryer, select the lowest heat setting and remove the shirt while slightly damp to minimize heat contact with the printed area.